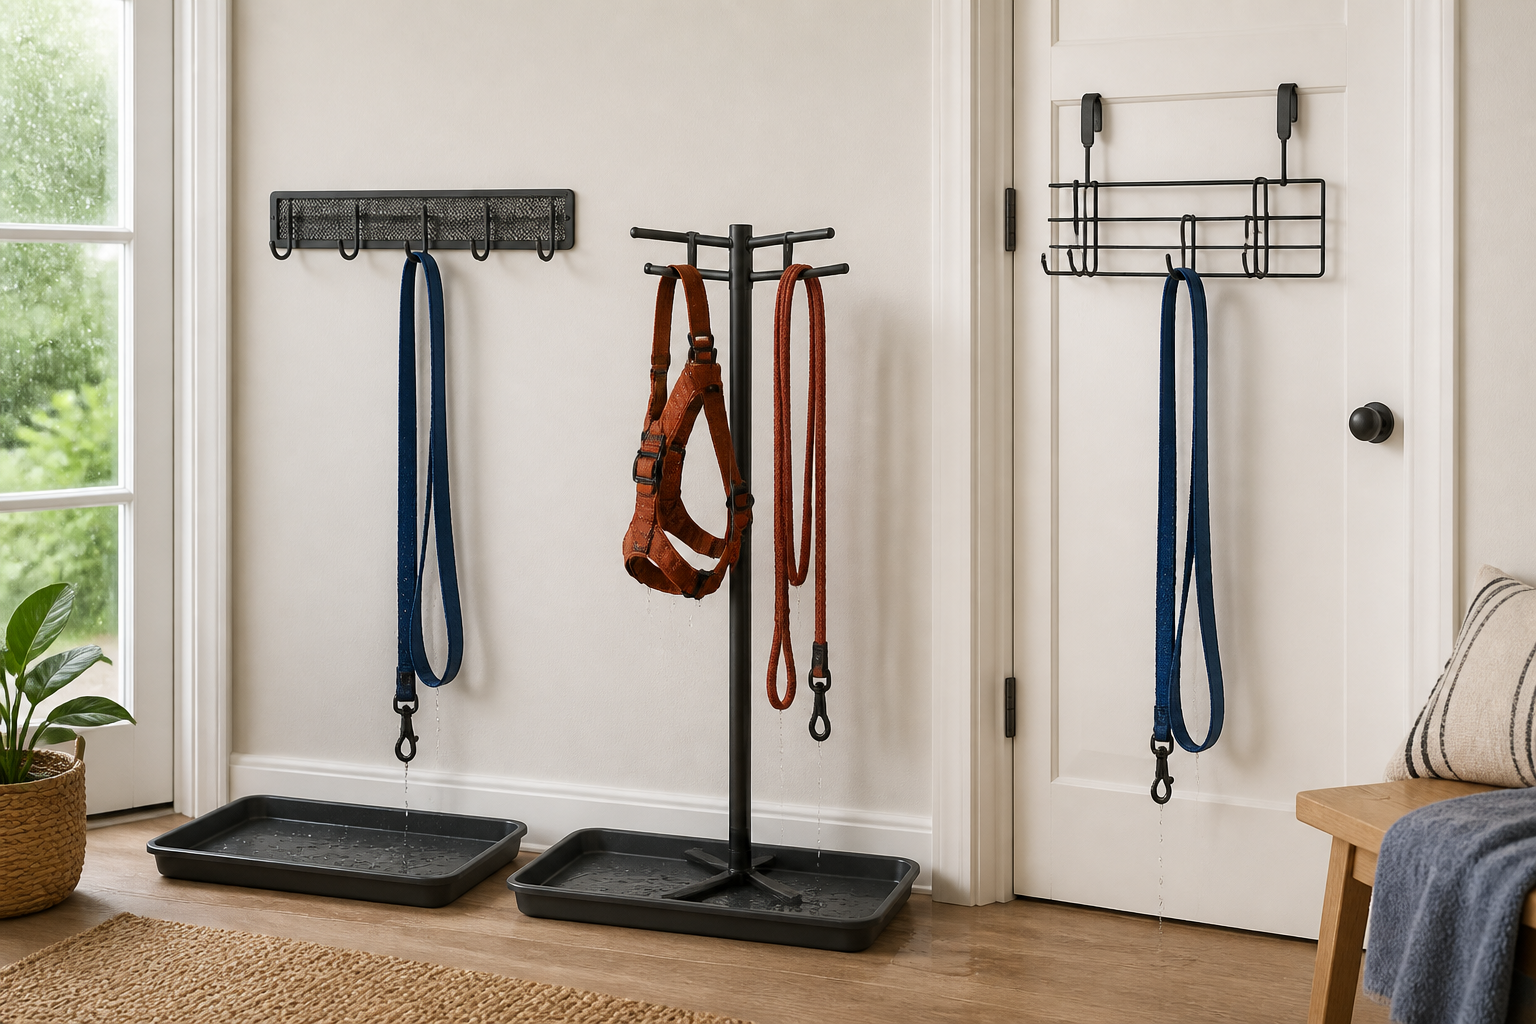
This category comparison does not promise a drying time, prevent material wear, or make damp gear hygienic by itself. Follow each leash and harness maker's cleaning and drying directions, inspect hardware and webbing before walks, and replace damaged equipment.
Quick Comparison: Match the Rack to the Entryway
Wall rail: fixed and easy to keep off the floor
A screw-mounted metal rail can create a predictable wet-gear zone. Wide spacing matters more than hook count: tightly bunched straps dry less evenly and can leave moisture against the wall. Confirm the wall construction, fasteners, documented load, and finish care.
Freestanding rack: movable with direct drip control
A compact stand above a removable tray keeps wall mounting out of the decision and makes cleanup visible. It needs a broad, stable base and enough height that clips and loops do not rest in collected water. Place it where pets and people cannot knock it over.
Over-door rack: removable but clearance-sensitive
An open-wire rack can suit renters when the bracket thickness, door gap, hinge side, and hanging depth all fit. Skip it if the door binds, cannot latch normally, swings gear into a wall, or places metal clips at head or pet height.
Measure the Whole Drying Zone
Measure the longest leash loop and harness drop while each item hangs loosely, then add clearance above the floor or tray. Note the wall width, baseboard projection, door swing, handle location, and the space needed to remove gear without brushing against clean coats or bags.
Plan where drips land. A shallow washable tray or floor-safe mat should extend beneath the wet ends without creating a curled edge or trip point. Keep moisture away from outlets, heaters, unfinished wood, and surfaces that the manufacturer says should remain dry.
Selection Criteria That Matter
- Spacing and airflow: Prefer open hooks or arms that let straps hang in separate loose loops rather than folded bundles.
- Drip control: Make sure a removable tray or washable, floor-compatible surface sits under every wet end.
- Measured load: Add the wet weight of leashes, harnesses, lights, and attachments; follow the rack maker's mounting and load directions.
- Materials and finish: Look for documented material and care information. Do not assume a painted or plated rack is corrosion-proof.
- Mounting: Match fasteners to the actual wall or door, avoid hidden utilities, and use qualified help when the mounting surface is uncertain.
- Clearance: Keep clips, loose loops, hooks, and the rack base out of door swings, walking paths, and pet reach.
- Cleaning: Choose smooth, accessible surfaces and a tray you can empty, wash, and dry without moving the entire entryway.
- Gear care: Follow the leash or harness label; some materials should be wiped, reshaped, or kept away from heat rather than simply hung.
Who Should Skip a Dedicated Drying Rack
Skip one if wet walks are rare, an existing well-spaced hook above a washable tray already works, or the only available location blocks a doorway. A closed basket is storage, not a useful drying setup for damp straps. Also skip loose freestanding or over-door formats when a pet pulls hanging gear or chews straps.
A rack cannot restore weakened webbing, a sticky buckle, a bent clip, or damaged stitching. Retire questionable walking gear according to its maker's guidance. For safe leash and harness fit, ask a qualified trainer or the product manufacturer rather than treating the rack as a safety solution.
The Bottom Line
Choose a ventilated wall rail for a permanent measured station, a stable freestanding rack when movable drip containment matters, or an open over-door rack only when door fit and clearance are sound. Open spacing, controlled drips, secure mounting, and an easy-to-clean location matter more than decorative hook count.
For the wider walking setup, compare dog raincoats for quick wet walks, towel robes after rainy outings, and wall-mounted entryway organizers.